
Reviewed · AUCKLAND CITY SIGHTSEEING
Auckland Explorer: Sightseeing Hop-on Hop-off Tour
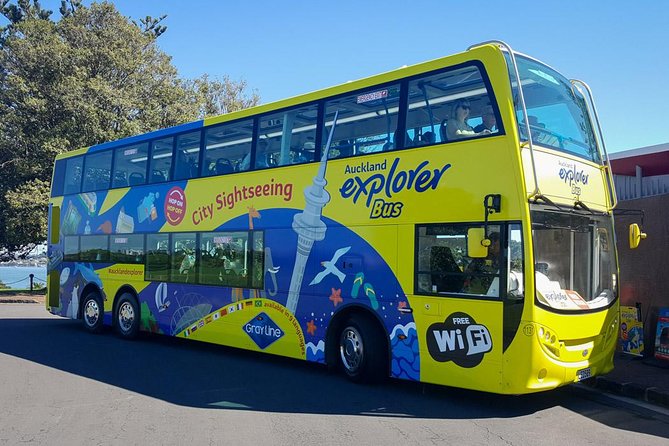
Auckland clicks into place fast on a hop-on hop-off bus. This one gives you English audio as you loop past Auckland’s key neighborhoods and viewpoints, with the freedom to hop off for as long (or as little) as you want. The ride is designed for first-timers who want the big picture without planning every turn.
I especially like two things: the tight set of stops that hit both icons (like the Sky Tower) and classic Auckland neighborhoods (like Parnell Village), and the practical onboard setup with air-conditioned buses plus Wi‑Fi. Add regular departures and you get a tour that works even if your day gets a little messy.
One drawback to plan around: service can feel more chaotic on busy cruise days, and that can mean longer waits at stops even with extra coaches. If you’re visiting with a strict timetable, leave buffer time and don’t schedule anything right at the hour.
In This Review
- Key Things to Know Before You Ride
- Why This Hop-On Tour Works for Auckland in a Tight Schedule
- Getting Oriented: The Two Routes and the “Museums Crossroad” Feel
- Downtown Start: Customs Street East to Sky Tower (and Why This Stop Order Helps)
- Parnell, Holy Trinity Cathedral, and the Walkable Charm of 279 Parnell Road
- Bastion Point to Kelly Tarlton’s: Sea Views and Penguin Energy
- The Volcanic Ring Stops: War Memorial, Domain Wintergardens, Mount Eden, Eden Park
- Auckland Zoo and MOTAT: When You Want More Than Photos
- Onboard Commentary, Wi‑Fi, and the Human Side of the Tour
- Price and Value: Does $43.44 Add Up for Your Day?
- Timing, Crowds, and the Cruise-Port Reality Check
- What to Bring and How to Use Your Day Like a Pro
- Who This Tour Suits Best (and Who Should Skip It)
- Should You Book the Auckland Explorer Hop-On Hop-Off Bus?
- FAQ
- How long is the Auckland Explorer hop-on hop-off tour?
- Where is the main departure point?
- What attractions are included on the routes?
- Does the bus have English commentary?
- Is the bus air-conditioned and does it have Wi‑Fi?
- How many days is the ticket valid?
- Is food included?
- What happens if the tour is canceled due to weather?
- Is it only one route, or are there multiple circuits?
Key Things to Know Before You Ride
- Two-day ticket flexibility: Use it on one busy day or stretch it into a second day if you want slower sightseeing.
- Hop off at top-name attractions: Sky Tower, Auckland Museum, SEA LIFE Kelly Tarlton’s, War Memorial Museum, and more.
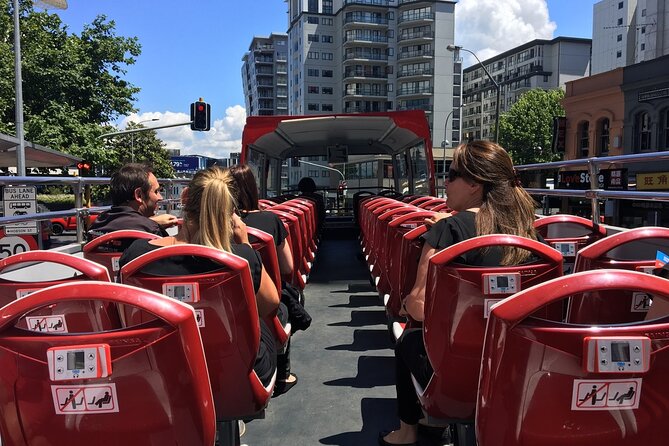
- Open-air option for skyline views: Sit upstairs when you can for better sightlines (weather permitting).
- Audio commentary in English: You get narration on the route so you can make sense of what you’re seeing.
- Cruise ship days can be crowded: Expect more people and longer waits at popular stops.
- Voucher exchange can involve SkyCity Auckland: Some visitors had to exchange vouchers at the Sky City Tower area before boarding.
Why This Hop-On Tour Works for Auckland in a Tight Schedule

Auckland is spread out, and it’s also hilly. That combo can turn “just a quick walk to the next stop” into a mini workout—especially if you want museum time, waterfront time, and skyline time all in one day. This hop-on hop-off bus tour helps you stitch it together with less walking and fewer logistics.
What I find practical is that the tour isn’t only about passing famous landmarks from the window. It actually puts you near them with a stop list that reads like a greatest-hits playlist: Sky Tower for the skyline, Auckland Museum for history and culture, Kelly Tarlton’s for penguins, and several viewpoints and civic spots around the central area.
The price—$43.44 per person—also makes more sense when you treat it as your transport for the day, not just a sightseeing bus. If you plan to visit several stops, the hop-on design keeps you from paying for lots of separate rides.
More ways to see Auckland in a day
- Waiheke Island: Ferry & Hop-On Hop-Off Explorer Bus Tickets
★ 4.6 · 3,311 reviews - Half-day Discover Auckland City Sightseeing Tour
★ 5.0 · 1,080 reviews - Auckland: Hop-On Hop-Off Explorer Bus Ticket
★ 4.4 · 1,064 reviews - Auckland Scenic Half-Day City Sightseeing Tour
★ 4.8 · 532 reviews
Getting Oriented: The Two Routes and the “Museums Crossroad” Feel
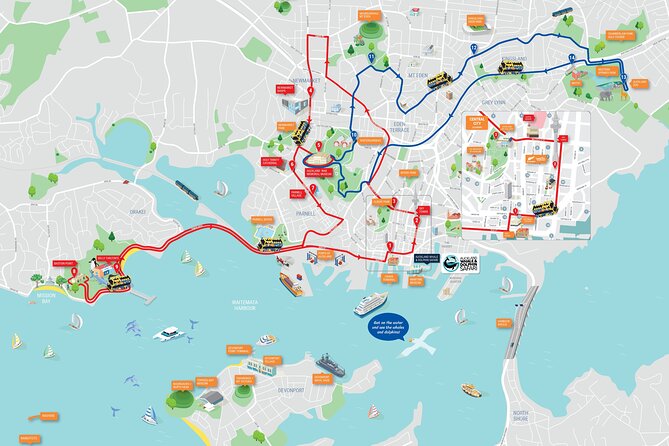
You don’t just get one fixed loop here. You get routes that cover different parts of the city, and they connect around the museum area. That matters because Auckland’s highlights don’t all sit neatly along one line. The tour is set up so you can ride the circuit you need, hop off where you care most, and then keep moving without building your own route.
A key practical idea: think of this as “one-hour building blocks.” One circuit is listed as about an hour to complete. If you only do part of it, you’re fine—just know you may miss certain neighborhoods unless you swap routes at the connection point around Auckland Museum.
One more thing I’d plan for: some people found it confusing when the narration referenced a route change and buses appeared to shift between the red and blue options around the museum. If you want to maximize value, I’d keep an eye on signage and ask staff when you’re boarding, especially if you’re trying to time your visit to a specific stop.
Downtown Start: Customs Street East to Sky Tower (and Why This Stop Order Helps)
Your day starts in Downtown Auckland at Customs Street East, the main departure point. That’s a smart opening because it gives you an easy baseline: you’re already in the core where lots of hotels and walking routes begin.
From there, you’ll head toward the Sky Tower area, with the stop at SkyCity Auckland on the corner of Victoria and Federal Streets. The Sky Tower stop is a big deal because it’s one of Auckland’s most recognizable landmarks, and it sets your mental map fast. Even if you don’t plan to go up, you’ll know where you are relative to everything else.
Next on the route are Central stops like Auckland Art Gallery and Westfield Newmarket (Broadway). Those are useful if you want breaks that aren’t “all uphill, all the time.” Art Gallery time works well when your brain needs context, and Newmarket is handy if you want a shopping pause or a quick meal before you climb.
Tip for you: If you’re jet-lagged or jet-tired, do Sky Tower and the central stops early. Then switch to more time-flexible attractions later, when you’re ready for longer hopping.
Parnell, Holy Trinity Cathedral, and the Walkable Charm of 279 Parnell Road

One of the most pleasant segments of this tour is the run into Parnell. You’ll hit Holy Trinity Cathedral at the corner of St Stephens Ave & Parnell Rd, then you’ll come to the Parnell Village stop at 279 Parnell Road.
This is the moment where the bus stops stop feeling like checkboxes and start feeling like neighborhoods. Parnell is compact enough that hopping off feels useful: you can browse, stretch your legs, and still be back at the bus without committing to a long transit plan.
The cathedral stop is also a nice rhythm change. City sightseeing can sometimes feel all glass and towers. Holy Trinity gives you a sense of older Auckland presence right in the middle of the route.
One caution: Auckland can be steep. Even if the bus gets you close, you’ll want comfortable shoes around Parnell and anywhere you choose to walk beyond the immediate stop.



Bastion Point to Kelly Tarlton’s: Sea Views and Penguin Energy
From the Parnell side, the route moves toward viewpoints and the waterfront vibe. You’ll pass the Bastion Point Lookout area at Hapimana Street. Bastion Point is the kind of stop that helps you understand Auckland’s relationship with water—this is a city that keeps pointing you toward the harbor and coastline.
Then you’ll reach Tamaki Drive at 23 Tamaki Drive for Sea Life Kelly Tarlton’s. That’s the stop that many people do not skip, because it’s one of Auckland’s easiest “standout attraction” choices. Kelly Tarlton’s SEA LIFE Aquarium is especially fun if you want a break from mostly urban sights—penguins make it feel like you’re doing something more specific than sightseeing.
If you’re planning your day, I’d use this stop as your energy reset. The bus takes you there, you can spend time inside (which is helpful if weather turns), and then you can decide whether you want another stop-heavy ride afterward or an earlier return.
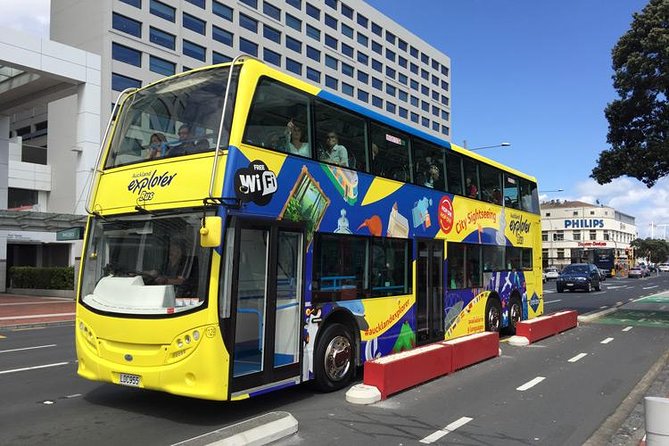
Also, keep in mind the bus is listed with Wi‑Fi onboard and air-conditioned comfort. If you’re using the upstairs open-air section, it’s great for views, but you can also switch to the closed area when you need a breather.
The Volcanic Ring Stops: War Memorial, Domain Wintergardens, Mount Eden, Eden Park

A second set of stops expands your view further inland and upward. This is where Auckland’s geography shows up on your schedule.
You’ll find:
- Auckland War Memorial Museum (outside south entrance)
- Domain Wintergardens
- Mount Eden
- Eden Park
- Auckland Zoo
- MOTAT Museum of Transport and Technology
Mount Eden is the stop you should respect. One review specifically called out the hike to the top of Mr Eden, so plan for stairs and uneven effort. That doesn’t make it bad—it makes it worth it if you like viewpoints and you don’t mind that Auckland’s “easy bus stop” still can involve climbing once you’re off the curb.
Domain Wintergardens adds a different feel. It’s a breather stop that works well if you want a quieter moment between bigger sights. Even a short pause can help you pace the day so you don’t end up only rushing from one thing to the next.
The War Memorial Museum is also a strong “anchor” stop. It gives weight to your city overview. You’ll come away with more context than you’d get from a quick skyline photo alone.
Planning tip: If you want Mount Eden views, give yourself time to get up and back down before the next bus. Don’t treat it like a 10-minute photo stop unless you move fast.
Auckland Zoo and MOTAT: When You Want More Than Photos
If you have time, the Zoo and MOTAT are useful additions because they broaden the tour beyond city icons.
Auckland Zoo is a natural fit if you’re traveling with kids or if you simply want a change of pace. It’s also a good choice if you’re tired of standing around waiting for the next bus and want a full chunk of time at a single location.
MOTAT (Museum of Transport and Technology) is one of those stops that can surprise you if you thought the day would be mostly views. It’s a more hands-on kind of attraction, and it’s a strong option when the weather isn’t cooperating for long outdoor wandering.
These stops also help the tour feel like more than a “hop and snap.” You can actually spend time, do something, and then ride back knowing you used your ticket for real.
Onboard Commentary, Wi‑Fi, and the Human Side of the Tour

The tour includes informative English audio commentary during the loop. That helps you understand what you’re seeing as you go by—especially with a city layout that can be confusing if you only rely on signage.
A bonus from the experience: the human touch. One review praised an ambassador named Hwani as great, and that lines up with what I’d expect from a good hop-on service—someone on the ground who can answer questions and keep route changes moving.
You also get onboard Wi‑Fi and air-conditioning. That sounds like small stuff, but it matters when you’re traveling during warmer weather or you’re trying to kill time between hops.
One practical detail: some people noted that audio equipment can sometimes skip or act up, and in a couple cases the narration wasn’t working properly. If that happens on your bus, tell the driver right away and switch buses at the next opportunity if possible.
Price and Value: Does $43.44 Add Up for Your Day?
Let’s talk value in the real-world way: a hop-on pass becomes worth it when you’re using it for multiple stops instead of just one or two.
At $43.44 per person, this is priced like a serious city sightseeing tool. You’re not just paying for a ride—you’re buying:
- transportation around multiple neighborhoods
- audio commentary for context
- hop-on flexibility over the day (and possibly into the next day)
So ask yourself this: will you visit at least 3 to 4 major stops? If yes, you’re likely in the sweet spot. If you only care about one attraction and you’ll do the rest by walking and rideshare, the bus may feel pricey.
Also, keep in mind how time works on the ground. Several people mentioned the tour running through a practical window closer to daytime hours, even when a longer time validity is implied. If your plan includes late-afternoon hopping, I’d check your schedule early so you’re not caught waiting around.
Timing, Crowds, and the Cruise-Port Reality Check
This is a top-rated style of tour, but Auckland can throw curveballs. The operator notes that when cruise ships are in port, it can get extremely busy. They use additional coaches, but wait times may still increase.
That affects your strategy. If you’re on a cruise day, avoid stacking too many timed entries back-to-back. Instead, do the big, flexible stops first, then lock in anything with a ticketed time after you see how fast you can board and disembark.
Some reviews described longer waits and packed buses at certain stops. You can reduce your odds of hassle by:
- boarding early in the day
- avoiding the most in-demand stops exactly at peak times
- giving yourself buffer time between hops
A hop-on bus is still one of the smartest moves in a short port day. Just treat it like a city system that can slow down, not like a metronome.
What to Bring and How to Use Your Day Like a Pro
The tour doesn’t include food or drinks, so you’ll want a plan for snacks and water. If you’re hopping around central Auckland and out toward the aquarium area, it’s easy to spend time at stops without noticing you’re hungry.
I also recommend:
- comfortable shoes for anywhere with stairs or uphill walking (Mount Eden comes to mind)
- a light layer if you’re planning open-air riding
- a little patience at busy stops, especially on cruise days
- a phone battery plan, since onboard Wi‑Fi may help but your real navigation is still your phone
For maximizing value, treat your first ride as scouting. Get oriented with Downtown, Sky Tower, and central stops. Then use your second hop pass (or your second circuit) to focus on what you liked most.
Who This Tour Suits Best (and Who Should Skip It)
This tour is ideal if you:
- are in Auckland for a short time and want an efficient overview
- like the idea of choosing stops on your own schedule
- want a simple way to reach major attractions like Sky Tower, Auckland Museum, Kelly Tarlton’s, and Mount Eden
- value onboard audio so you’re not stuck reading every sign
It may not be your best match if you hate waiting. A few experiences describe delays, crowded boarding, and commentary glitches. If your day is tightly timed or you’re very schedule-driven, you might prefer a private driver or a mix of rideshare plus walking.
Should You Book the Auckland Explorer Hop-On Hop-Off Bus?
If you’re trying to make Auckland make sense fast, I’d book this. The combination of major stop coverage, onboard English commentary, and the ability to hop off without planning every detail is exactly what a first (or second) day in town needs.
Here’s how to decide quickly:
- Book if you want multiple stops and flexible timing.
- Book if you’ll enjoy viewpoints and want an easier way to reach them without stitching together rides.
- Consider a different plan if you’re only visiting one attraction or you can’t deal with crowds and occasional delays.
For most visitors, it hits the sweet spot between cost, convenience, and seeing more of Auckland than you’d manage on foot alone.
FAQ
How long is the Auckland Explorer hop-on hop-off tour?
The loop is listed as about an hour to complete. You can hop on and off throughout the day using the ticket you buy.
Where is the main departure point?
The main departure point is at Stop 1/23 Customs Street East in Downtown Auckland.
What attractions are included on the routes?
Stops include major sights such as SkyCity Auckland (Sky Tower area), Auckland Museum, Kelly Tarlton’s SEA LIFE Aquarium, Auckland War Memorial Museum, Domain Wintergardens, Mount Eden, Eden Park, Auckland Zoo, and MOTAT.
Does the bus have English commentary?
Yes. You’ll get English audio commentary while you’re onboard.
Is the bus air-conditioned and does it have Wi‑Fi?
Yes. The tour includes air-conditioned vehicles and Wi‑Fi on board.
How many days is the ticket valid?
The bus ticket is valid for one or two days, based on the option you choose.
Is food included?
No. Food and drinks are not included.
What happens if the tour is canceled due to weather?
The experience requires good weather. If it’s canceled due to poor weather, you’ll be offered a different date or a full refund.
Is it only one route, or are there multiple circuits?
There are multiple routes/circuits, and they connect around the Auckland Museum area, so you can ride one or mix options based on what you want to see.
More Tours Around Auckland
- Waiheke Island: Ferry & Hop-On Hop-Off Explorer Bus Tickets
★ 4.6 · 3,311 reviews - Hobbiton & Waitomo Caves Guided Day Trip from Auckland incl lunch
★ 5.0 · 2,677 reviews - From Auckland: Hobbiton & Waitomo Caves Day Trip with Lunch
★ 4.9 · 2,505 reviews - Auckland Dolphin and Whale Watching Eco-Safari Cruise
★ 4.5 · 1,790 reviews - Skydive Auckland
★ 5.0 · 1,516 reviews
Seeing Auckland in a Day
- Waiheke Island: Ferry & Hop-On Hop-Off Explorer Bus Tickets
★ 4.6 · 3,311 reviews - Half-day Discover Auckland City Sightseeing Tour
★ 5.0 · 1,080 reviews - Auckland: Hop-On Hop-Off Explorer Bus Ticket
★ 4.4 · 1,064 reviews - Auckland Scenic Half-Day City Sightseeing Tour
★ 4.8 · 532 reviews - 2025 Award Winning: Auckland City Highlights Half Day Tour
★ 5.0 · 516 reviews
Fresh off the boat: newer Auckland tours to browse






Auckland City Sightseeing, compared.
 ★ 4.6Waiheke Island: Ferry & Hop-On Hop-Off Explorer Bus TicketsFrom $593,311 reviews
 ★ 5.0Half-day Discover Auckland City Sightseeing TourFrom $461,080 reviews
 ★ 4.4Hop-On Hop-Off Explorer Bus TicketFrom $381,064 reviews
 ★ 4.8Auckland Scenic Half-Day City Sightseeing TourFrom $44532 reviews
 ★ 5.02025 Award Winning: Auckland City Highlights Half Day TourFrom $99516 reviews
 ★ 4.0Arrival Transfer: Auckland Airport to Auckland Central City CentreFrom $26493 reviews
 ★ 5.0Auckland Scenic Day Tour Full-Day- 8 HOURSFrom $133376 reviews
 ★ 5.0Rotorua Highlights Tour from Auckland with Optional ExtrasFrom $214373 reviews
Browse the lists this tour appears in