
Reviewed · HOBBITON & MIDDLE-EARTH DAY TRIPS
5-Day Bay of Islands, Auckland, Hobbiton, Rotorua & Waitomo Tour
There are a lot of stops, but it works. This 5-day North Island loop strings together Bay of Islands, Waitomo, and Rotorua into one organized ride with hotel pickup and key admission tickets included. I especially like that the plan handles the big logistics for you, and that the itinerary mixes coast, city, and geothermal sights instead of repeating the same scenery. One consideration: it’s packed enough that you’ll want to keep your expectations realistic about downtime between activities.
For me, the best part is the “front-loaded” convenience. You start with a northward drive and a ferry day that doesn’t require you to plot routes, then you get guided touring where it matters most (Treaty Grounds, glowworms, Te Puia, Hobbiton). The only real trade-off is pace. When you’re touring by coach across several regions, travel days are travel days, and comfort depends on how you handle early mornings and a day that moves on schedule.
In This Review
- Key Points You’ll Care About on This Tour
- A North Island Highlights Stack, Without the Car-Rental Math
- Day 1: Auckland’s North Coast to Paihia, Plus Russell and the Hole in the Rock
- Day 2: Waitangi Treaty Grounds, Then On to Auckland Central
- Day 3: Auckland Sightseeing on a Tight Schedule, Plus Room to Roam
- Day 4: Waitomo Glowworm Caves to Te Puia’s Hot Springs and Maori Performance
- Day 5: Rotorua Morning Freedom, Then Hobbiton and Back to Auckland
- Hotel Bases That Make the Whole Loop Feel Less Stressful
- Price and Value: What You’re Really Paying For
- Who This Tour Suits Best (And Who Might Want a Different Plan)
- Final Decision: Should You Book This 5-Day North Island Tour?
- FAQ
- What’s included in the tour price?
- What kind of hotel accommodation is provided?
- Are meals included?
- What time does the tour start each day?
- How big is the group?
- What is the cancellation window for a full refund?
Key Points You’ll Care About on This Tour
- Hotel pickup and drop-off daily: you don’t have to coordinate transit between towns.
- Admission included for Waitomo Caves, Hobbiton, and Te Puia: fewer ticket queues and less ticket-planning stress.
- Small group size (max 14): easier to hear guides and ask questions during stops.
- A curated North Island hit list: Bay of Islands + Auckland + Waitomo + Hobbiton + Rotorua in one circuit.
- 4-star lodging in three bases: you sleep comfortably in Auckland, Paihia, and Rotorua (instead of constant packing).
A North Island Highlights Stack, Without the Car-Rental Math
This tour is built for people who want the iconic North Island experiences, but don’t want the effort of arranging each piece separately. You’ll ride in an air-conditioned vehicle, get local guide commentary, and hop between Auckland, Paihia, and Rotorua where most of the major sights sit.
I like how the itinerary covers different “modes” of New Zealand. You get ocean and wildlife in the Bay of Islands, city life in Auckland, underground wonder at Waitomo, and then geothermal drama plus a Maori cultural performance at Te Puia. That mix matters because it keeps the trip from feeling repetitive. You’re not just driving from one attraction to another; you’re changing environments.
The price is not cheap at $1,362.16 per person, but value comes from what’s bundled. Your ticket costs for Waitomo, Hobbiton, and Te Puia are included, along with transfers and guided tours at the stops. Add in multiple nights in 4-star hotels, and the total starts to look more like a “package price” than an add-on fee parade.
More ways to reach the Shire from Auckland, side by side
- Hobbiton & Waitomo Caves Guided Day Trip from Auckland incl lunch
★ 5.0 · 2,677 reviews - From Auckland: Hobbiton & Waitomo Caves Day Trip with Lunch
★ 4.9 · 2,505 reviews - Auckland: Hobbiton Movie Set Day Trip with Festive Lunch
★ 4.8 · 1,431 reviews - Hobbiton Movie Set Small Group Tour from Auckland
★ 5.0 · 1,380 reviews
Day 1: Auckland’s North Coast to Paihia, Plus Russell and the Hole in the Rock
You begin around 7:30 am and head north via the Hibiscus Coast and through Whangarei, then arrive in Paihia in the Bay of Islands region. This is one of those travel-day setups where the road trip itself becomes part of the experience. You’re moving into scenery that feels distinctly coastal, not just “getting to the next town.”
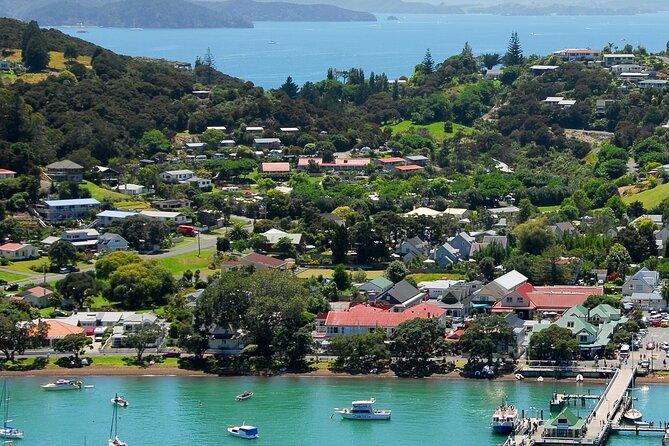
In Paihia, you’re set up for a great “starter combo” day: ferry time to Russell, a township tour, and then a nature cruise. First comes Russell, described as the original capital of New Zealand. The ferry transport is included, and you get a guided tour of Russell’s township. Even if you’re not a deep-dive history person, this gives you a sense of place quickly—what the area was, and why it mattered.
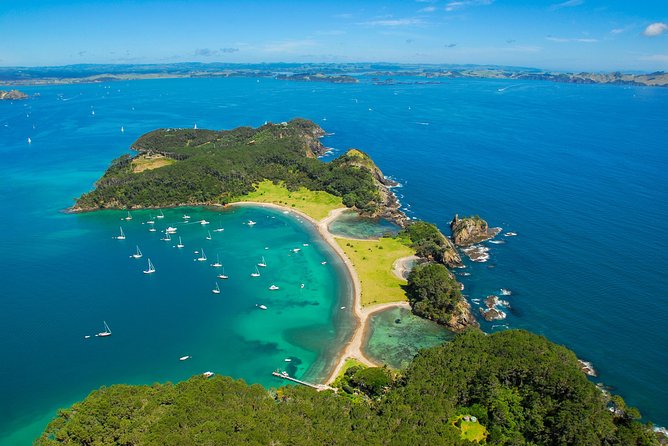
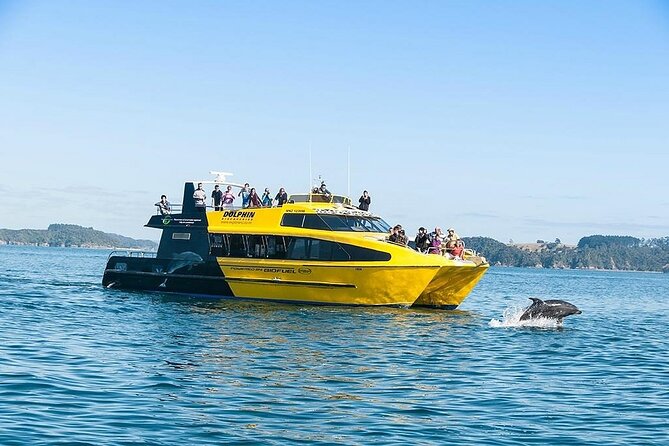
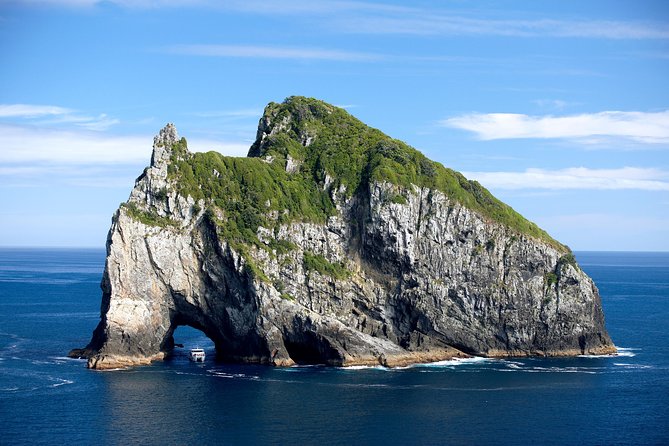
Then you shift to the main event: a three-hour nature cruise to the Hole in the Rock. The wording matters here: it’s weather and sea condition dependent, so you might not always go through the hole. When conditions allow, sailing through that rock opening is exactly the kind of “only here” moment that makes the Bay of Islands worth visiting. The cruise is also where you may spot dolphins and sea birds. That wildlife angle is one reason I think this first day lands well: it’s not only sightseeing; it’s watching what the ocean is doing.
After you return to Paihia, you’re free in the afternoon and evening to explore on your own. That downtime is useful. It’s one of the few spots in the trip where you can slow down, grab food, and walk around without being herded.
Day 2: Waitangi Treaty Grounds, Then On to Auckland Central
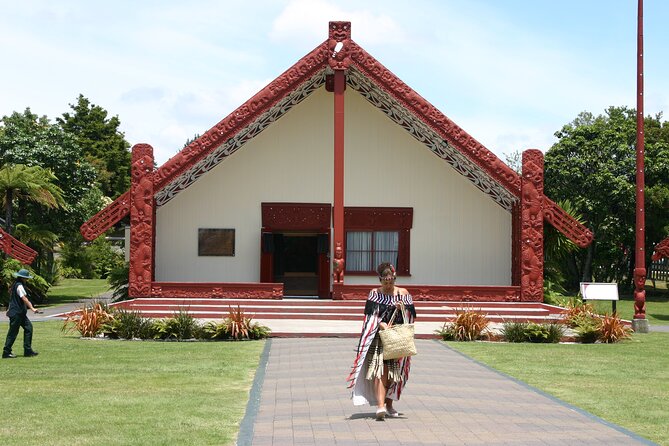
Day 2 starts with a guided tour at the Waitangi Treaty Grounds, the site of the historic treaty between Maori and European pioneers. You’re transferred from your accommodation to the grounds, then you tour with a guide. This is one of the stops that tends to benefit from having someone explain what you’re looking at, since it’s not just scenery—it’s context.
You spend about three hours here, then you head back to Paihia to collect luggage for the onward coach journey to Auckland. That sequence is practical: you’re not constantly repacking in the middle of the day, and the transfer is handled for you.
In the evening, you’re based in Auckland Central, with time to explore independently. This is a smart pivot. You’ve had a structured morning that teaches you about the country’s foundation, then you have room to wander and find your own rhythm in a city that’s easier to enjoy once you’re not rushing from one bus to another.
Day 3: Auckland Sightseeing on a Tight Schedule, Plus Room to Roam
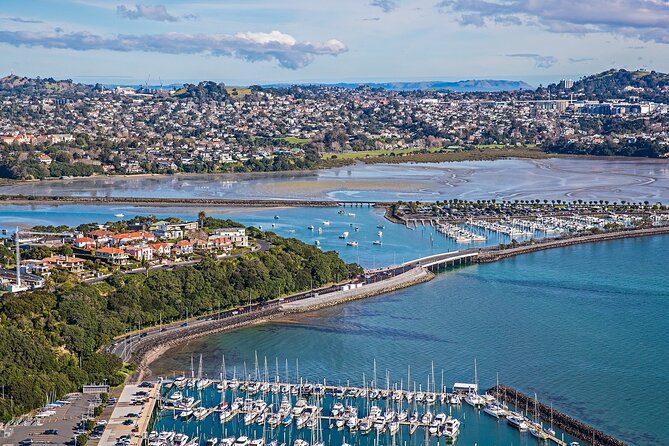
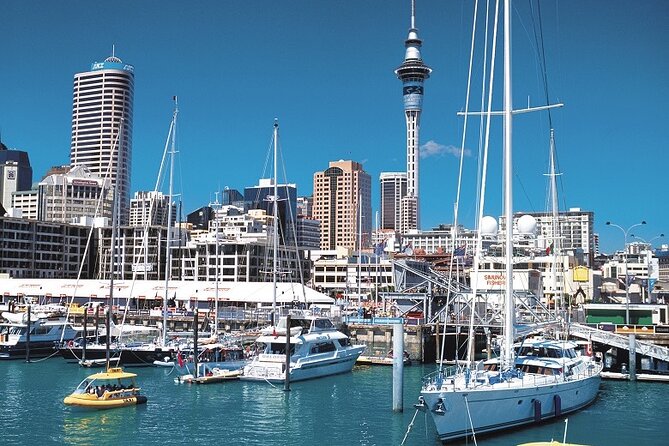
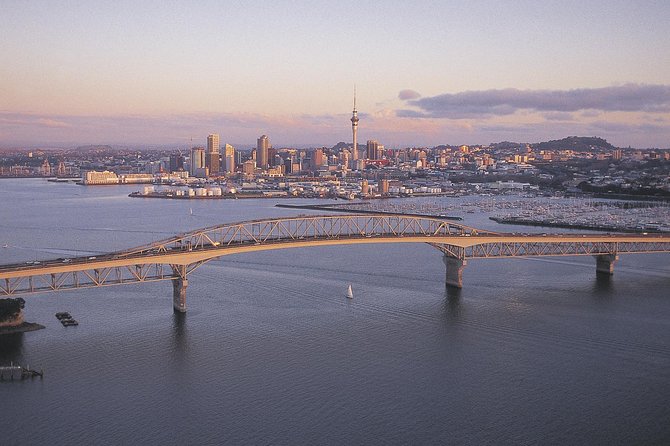
On Day 3, you’re picked up from your Auckland accommodation for a 3-hour city sightseeing tour. The route is described as taking in highlights of Auckland, referencing the rolling landscape created by 49 dormant volcanoes and the city’s position on the shores. Even when you don’t know volcanic geology, that kind of framing helps you “read” the city when you’re looking at it from different viewpoints.
The tour returns you early afternoon, and then you’re on your own for the rest of the day and evening. This flexibility is important because it lets you choose how you want to spend your time. If you want skyline views, you’ve got the option of Sky Tower, and if you prefer museum-style stops, Auckland Central has plenty of self-guided options. The key here is timing: you get enough daylight after the tour to make your own decisions, not just squeeze in dinner and go to bed.
One small consideration: because you’re touring Auckland and then leaving later in the week, it’s smart to prioritize just one or two “must-do” extras in the city. Otherwise, the remaining time can feel like you’re running around trying to fit everything in.
Other Waitomo cave trips leaving Auckland, compared
Day 4: Waitomo Glowworm Caves to Te Puia’s Hot Springs and Maori Performance
Day 4 is where the North Island starts feeling like a sci-fi movie. You travel from Auckland to the Waitomo Glowworm Caves by road, including a guided tour. The highlight you should look forward to is the boat ride through the glowworm grotto. The experience is guided, and the boat-through part is exactly what makes Waitomo famous—it’s not something you’d want to guess your way through.
After Waitomo, you continue by road toward Rotorua, traveling via the Waikato Plains and the Fitzgerald Glade. This drive sequence matters because it breaks up the day. Even if your schedule is full, you’re getting scenery changes that help the trip feel like more than a checklist.
Once you arrive in Rotorua, you go straight to Te Puia. Your guided visit is focused on the thermal valley, including the Pohutu Geyser and boiling mud pools. The description also notes a Maori cultural performance as part of the experience. This combo is a big reason Rotorua is so popular: you get both the geothermal spectacle and the human story tied to the region.
At the end of Te Puia, you’re transferred to your central Rotorua hotel. Then you have the rest of the evening free. In my opinion, that’s a good balance. A day like this can leave you feeling tour-fatigued, and free time lets you reset, eat well, and decide how much extra geothermal exploring you want to do.
Day 5: Rotorua Morning Freedom, Then Hobbiton and Back to Auckland
The morning of Day 5 is left open for you in Rotorua. That’s a nice touch because Rotorua geothermal areas can be worth seeing at your own pace. Even if you don’t do anything “extra,” having space to breathe makes the last day feel less like a finale and more like a gentle landing.
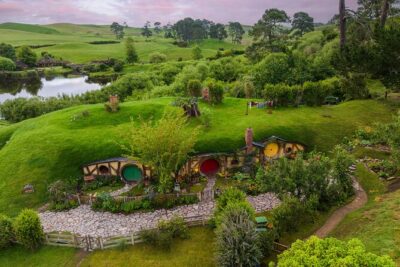
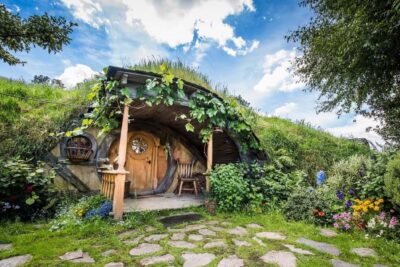
Then you head to Hobbiton Movie Set (via Matamata) and tour the Shire-themed property, including 44 hobbit holes. This is one of the experiences where a guided visit helps, because it turns the visuals into a story and keeps you from just walking through and hoping you notice what matters. You’ll see fairytale-style scenes created for the Lord of the Rings and Hobbit films, and the guided format is the part that keeps it feeling like more than photo stops.
After the Hobbiton tour, you depart Matamata and continue traveling north to Auckland. You arrive in Auckland Central early evening to end the five-day tour.
Hotel Bases That Make the Whole Loop Feel Less Stressful
This tour uses three main lodging bases: Auckland for two nights, plus one night each in Paihia and Rotorua. You’re promised comfortable 4-star hotel accommodation, and you also get daily hotel pickup and drop-off in Auckland, Paihia, and Rotorua.
That hotel strategy matters for your trip quality. It reduces the number of times you have to pack and move, and it makes it easier to plan meals. Also, if you’re the type who likes to start each day clean and organized, having a fixed base makes that easier.
One practical angle: since the trip ends back in Auckland Central, you’re not stuck finishing in a far-off neighborhood with limited options. You end where sightseeing and transport options are more concentrated.
Price and Value: What You’re Really Paying For
Let’s talk money in a real way. $1,362.16 per person covers a bundle of what tends to cost time and decision-making in New Zealand: transport between multiple regions, guided tours at key attractions, and major admissions.
Included admissions you can name up front are:
- Waitomo Glowworm Caves
- Hobbiton Movie Set
- Te Puia
On top of that, you get lodging at a 4-star level and guided experiences at the treaty site and in both Rotorua and the Bay of Islands area. If you were to DIY all of that—timing ferry rides, booking caves and Hobbiton, coordinating a Rotorua day—it would likely take serious planning and multiple reservations.
So the question isn’t only whether the price feels high. It’s whether you want to trade planning time for a set schedule. If you do want structure, this tour’s pricing starts making more sense.
Who This Tour Suits Best (And Who Might Want a Different Plan)
This tour is ideal if you’re:
- Short on time and want the North Island highlights without driving yourself
- Traveling solo and prefer everything handled, especially transportation and ticketed attractions
- The type who likes guided touring when the site needs context (Treaty Grounds, Te Puia, caves)
It may be less ideal if you:
- Hate tight pacing and want long, unstructured days
- Plan to spend lots of time in Auckland on your own since the schedule builds in sightseeing plus free evenings
- Want maximum flexibility to skip or swap stops, since it’s a fixed route
Also, with a maximum of 14 travelers, it’s not a huge crowd situation. You’ll still be in a group, but it should feel manageable.
Final Decision: Should You Book This 5-Day North Island Tour?
If you want an efficient, guided route that hits the biggest names—Bay of Islands cruise, Waitomo glowworms, Te Puia thermal valley and cultural show, and Hobbiton—this is a strong match. The value is in the bundling: hotel stays, transfers, guided tours, and major admissions are part of the deal, not extra chores you have to manage.
I’d recommend booking when you’re the kind of traveler who’d rather spend your energy on the places themselves than on scheduling. If that sounds like you, this tour is a smart way to see a lot of New Zealand without turning the trip into a spreadsheet.
FAQ
What’s included in the tour price?
The tour includes hotel pickup and drop-off for Auckland, Paihia, and Rotorua, air-conditioned vehicle transport, local guide commentary, admission fees for the Waitomo Caves, Hobbiton, and Te Puia (plus transport and tour fees listed in the itinerary), and guided tours of the attractions.
What kind of hotel accommodation is provided?
You get 4-star hotel accommodation in Auckland (two nights) and in Paihia (one night) and Rotorua (one night), with transfers from the hotel each day.
Are meals included?
Food and drinks are not included.
What time does the tour start each day?
The tour start time is listed as 7:30 am.
How big is the group?
This tour has a maximum of 14 travelers.
What is the cancellation window for a full refund?
You can cancel up to 6 days in advance of the experience for a full refund (cut-off times are based on the local time of the experience).
Rotorua, Steam and Silica
- Waitomo Caves & Rotorua – Te Puia Small-Group Tour from Auckland
★ 4.5 · 681 reviews - Auckland: Hobbiton, Rotorua and Wai-O-Tapu Day Tour
★ 4.8 · 458 reviews - Hobbiton & Rotorua including Wai-O-Tapu – Small Group Tour from Auckland
★ 5.0 · 450 reviews - Rotorua Highlights Tour from Auckland with Optional Extras
★ 5.0 · 373 reviews - From Auckland or Rotorua: Hobbiton & Waitomo Tour with Lunch
★ 4.9 · 281 reviews
Down to the Glowworm Caves
- Hobbiton & Waitomo Caves Guided Day Trip from Auckland incl lunch
★ 5.0 · 2,677 reviews - From Auckland: Hobbiton & Waitomo Caves Day Trip with Lunch
★ 4.9 · 2,505 reviews - Hobbiton & Waitomo Caves Small-Group Tour W Lunch from Auckland
★ 5.0 · 1,117 reviews - Hobbiton & Waitomo Caves Guided Tour from Auckland with Lunch
★ 4.5 · 796 reviews - From Auckland: Waitomo & Hobbiton Bus Tour with Lunch
★ 4.7 · 789 reviews
Hobbiton, More Ways to the Shire
- Hobbiton & Waitomo Caves Guided Day Trip from Auckland incl lunch
★ 5.0 · 2,677 reviews - From Auckland: Hobbiton & Waitomo Caves Day Trip with Lunch
★ 4.9 · 2,505 reviews - Auckland: Hobbiton Movie Set Day Trip with Festive Lunch
★ 4.8 · 1,431 reviews - Hobbiton Movie Set Small Group Tour from Auckland
★ 5.0 · 1,380 reviews - Hobbiton & Waitomo Caves Small-Group Tour W Lunch from Auckland
★ 5.0 · 1,117 reviews
Fresh off the boat: newer Auckland tours to browse


Hobbiton & Middle-earth Day Trips, compared.
 ★ 4.9Hobbiton Movie Set: Guided Tour TicketFrom $718,167 reviews
 ★ 5.0Hobbiton & Waitomo Caves Guided Day Trip from Auckland incl lunchFrom $2292,677 reviews
 ★ 4.9Hobbiton & Waitomo Caves Day Trip with LunchFrom $2212,505 reviews
 ★ 4.8Hobbiton Movie Set Day Trip with Festive LunchFrom $1821,431 reviews
 ★ 5.0Hobbiton Movie Set Small Group Tour from AucklandFrom $1831,380 reviews
 ★ 5.0Hobbiton & Waitomo Caves Small-Group Tour W Lunch from AucklandFrom $2351,117 reviews
 ★ 4.5Hobbiton & Waitomo Caves Guided Tour from Auckland with LunchFrom $271796 reviews
 ★ 4.7Waitomo & Hobbiton Bus Tour with LunchFrom $261789 reviews
Browse the lists this tour appears in